Drawing with light. That, in a nutshell, is what an edge-lit panel does. You engrave a design in transparent acrylic, place an LED strip along the edge, and suddenly, exactly what you've drawn lights up. The rest of the panel remains transparent, making your design appear to float.
Illuminate your logo, illustration, or text, or create personalized panels for customers. A beautiful product to make and display. Do you have a laser cutter that can cut acrylic? Then you can easily make an edge-lit sign yourself.
In this blog post, you'll learn how edge-lit works, how to make one yourself, and how different materials react. Below, you'll also find inspiring tutorials from other makers.
Why is this the perfect laser project?

Lasers are ideal for creating edge-lit panels. You can also achieve a luminous effect by scratching, drawing with a marker, or milling, but the technique always determines the appearance of your panel. Laser cutting is the best way to achieve an accurate, detailed reproduction of your design with a clean and clear result.
What is edge-lit acrylic?

Edge-lit literally means illuminated from the edge . The principle is simple yet effective: you place an LED strip on the side of a transparent acrylic sheet.
The light travels through the material and refracts on engravings and edges, causing those areas to illuminate. The rest of the plate remains transparent.
You can also work with multiple panels. Place a separate LED strip under each panel and control them independently. The light stays within its own layer, allowing you to work with different colors or levels.
The result is a floating light image with a modern, almost futuristic look. Thanks to the precision of laser cutting, even the smallest details can be perfectly visualized.
This is what you need
-
Design
-
Acrylic sheet
-
Holder with LED light
-
Laser cutter that can cut acrylic
Design
A simple design can quickly make a big impression. Think of a logo, illustration, or signage. Play with the different effects of line and surface engravings: lines create a bright, sparkling effect, while surface engravings have a softer glow.
Also see our infographic at the bottom of this blog for a good example.
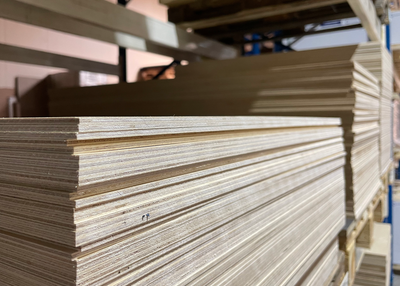
Acrylic sheet
Acrylic is perfect for laser cutting. The standard choice is clear, colorless acrylic – transparent, smooth, and with a distinct light effect. We've tested several types; scroll down to see what effects they produce.
Holder with LED light
You can buy a holder online or make one yourself. The holder determines the material thickness you use and how the light hits the plate.
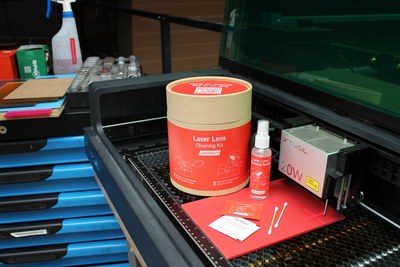
Laser cutter
Use a CO₂ laser with sufficient power for the thickness of your plate.
Diode lasers are less suitable for this, because they cannot cut the material properly.
Step by step: how to make it
Want to create an edge-lit panel? Follow these steps for a beautiful result.
1. Design with light in mind
Keep the design simple. The edge-lit effect already creates the wow factor.
It usually works well to leave some white space around your engraving, so it appears as if your drawing is floating.
You can use line and plane engravings in your design. Lines are sharp and clear, while planes create an evenly illuminated area.
For an even distribution of light, rectangular shapes work best.
Balls or other protruding shapes conduct light less effectively to the ends, which can leave the edges darker.
2. Choose a holder
Choose a holder with LED light or make one yourself.
Pay close attention to the material thickness your holder can handle. The plate must be firmly and tightly fitted in the slot for optimal light transmission and a neat finish.
3. Laser cutting and engraving
It's best to use a CO₂ laser for cutting and engraving acrylic. Check out our blog post on how to find the best settings for your machine (link to blog).
Work carefully and use protective film and gloves where possible.
Every scratch or fingerprint will light up and distract from your design.
It's best to engrave on the back of the plate. This allows you to see through the material to the engraving, which creates depth and reduces internal reflections.
If you are working with two panels of engravings , mirror one of the files.
In this way, one plate has the engraving on the front and the other on the back, the engravings lie directly against each other and you prevent an unwanted mirror effect in the plate.
4. Place the panel and enjoy
Mount your panel in the selected holder, ensuring the LED shines directly onto the side of the acrylic. Carefully remove the protective film, preferably wearing gloves, to avoid leaving any residue.
Turn on the lights and enjoy your own edge-lit panel!
Our example: an interactive infographic

To show what you can do with edge-lit, we created an example with an infographic of the skeleton of the dinosaur Trix in Naturalis.
The skeleton is a line drawing illuminated with white LED light. In front of it is a second layer with colored surface engravings. A mixer allows you to mix the RGB channels and change the color from green to red or purple.
The surface engravings reveal what's special about the skeleton, clarifying the story behind this exhibit. The panel fits perfectly in a dark exhibition space, without blocking the view or disrupting the lighting.
Tip : We've mirrored the panels so the engravings are flush against each other. This prevents unwanted reflections within the panel.
Choosing the right material

What material do you use for an edge-lit panel? We tested several types:
-
Clear acrylic . Ideal for edge-lit panels. Your design will shine brightly while you can see through the sheet. Choose 3 mm or thicker, depending on your mount.
-
Fluorescent acrylic . This material emits a subtle glow even in daylight. Suitable for white LED lighting. Avoid combining it with colored LEDs, as the material color will overpower it.
-
Frosted acrylic . It provides a beautiful, diffused illumination and a soft spread of light. You can't see through it, though.
-
Mirrored and colored acrylic. Less suitable. Mirrored acrylic reflects light and therefore loses its luminous effect. Colored acrylic mutes the light due to its pigments.
View the complete acrylic collection from Lasersheets

Inspiration for your next project
Want to see how others are doing it? These resources are packed with helpful tips and examples:
YouTube: Creating a Custom Edge-Lit Sign: Tips & Tricks
Steve Makes Everything shows step-by-step how he designs and installs his panel.
LightBurn Forum: My first go at LED Edge Lit Acrylic
Creators share their first attempts, mistakes, and solutions. Learn from their experiences.
Instructables: Laser Cut Edge-Lit Acrylic With Base
A complete manual, including how to make your own LED strip base.
Instructables: Lit-O-Pane (Full Color Edge-Lit Photo)
A creative variation where you convert photos into colorful edge-lit works of art.
Ready to get started?
An edge-lit panel is one of the most fun laser projects you can make. It combines technical precision with creative freedom, and the end result is always eye-catching.
Whether you're creating a simple logo or a complex, multi-layered artwork, with the right acrylic and a little experimentation, you can create something you can be truly proud of.